Recently, I received the same texture missing issue which was reported by two different Taiwan customers. They couldn't see their own texture maps (images) after loading RVT models via Forge Viewer, and didn't know how to do. After some research, I found that is quite easy and just need some tricks. This blog will show you the simplest way to make it happen, let's see how to do it!
Before we start, there are serval things about the Revit texture translation you need to know.
1. The visual style in Revit's 3D views must be Realistic.
2. The following items should contain only ASCII characters or should be named in ASCII characters:
- The filenames of the texture image, e.g. red-brick.jpg.
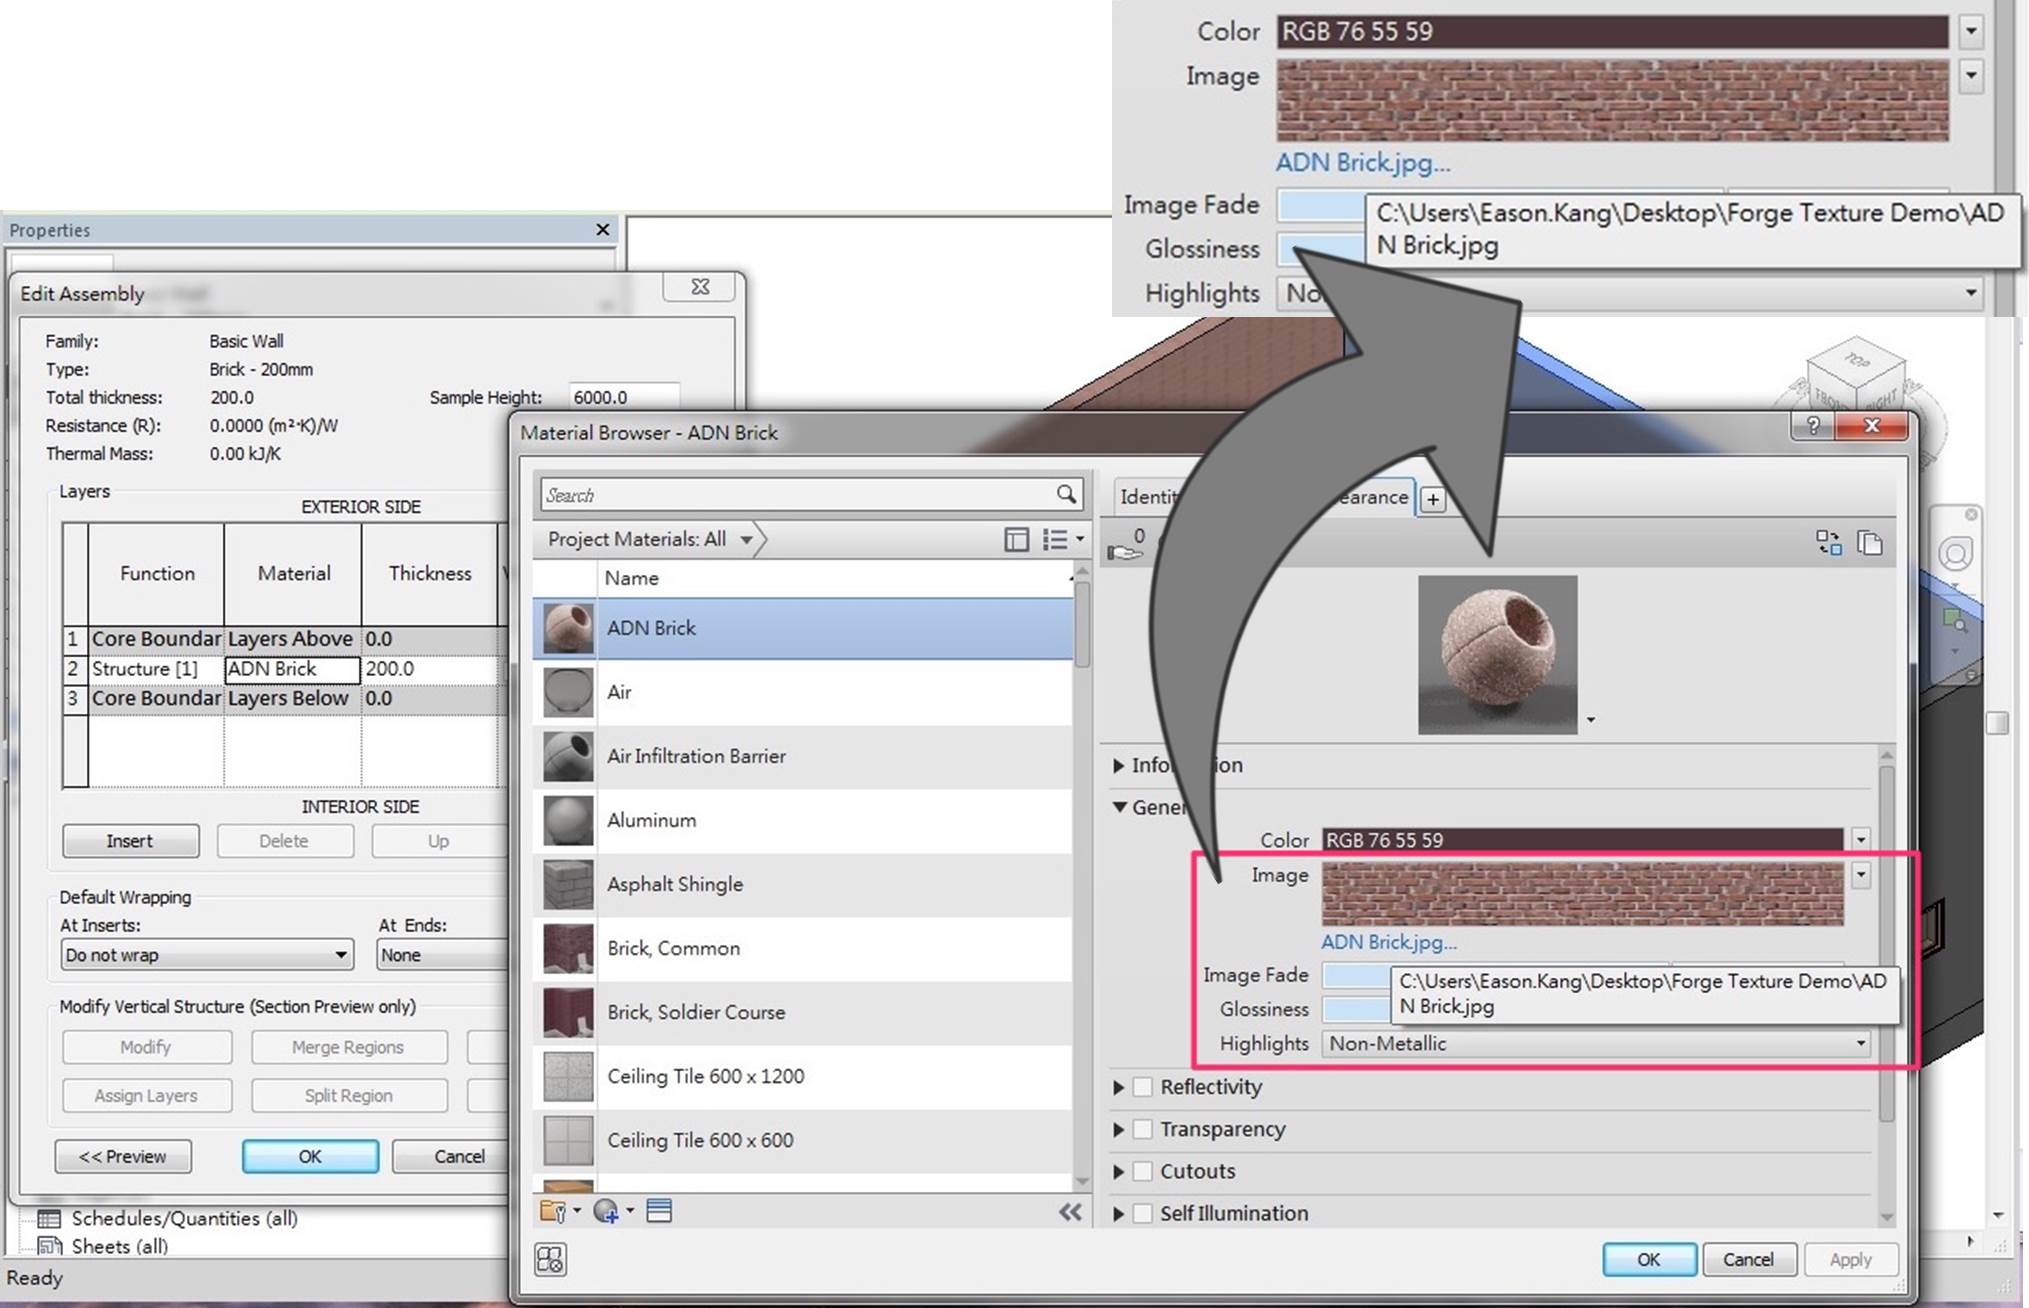
- The file path of the texture image (i.e. the image source paths under the Appearance tab of the custom material in the Revit Material Browser), e.g. C:\adn\textures\red-brick.jpg.
- The filename of the RVT file (the Revit project).
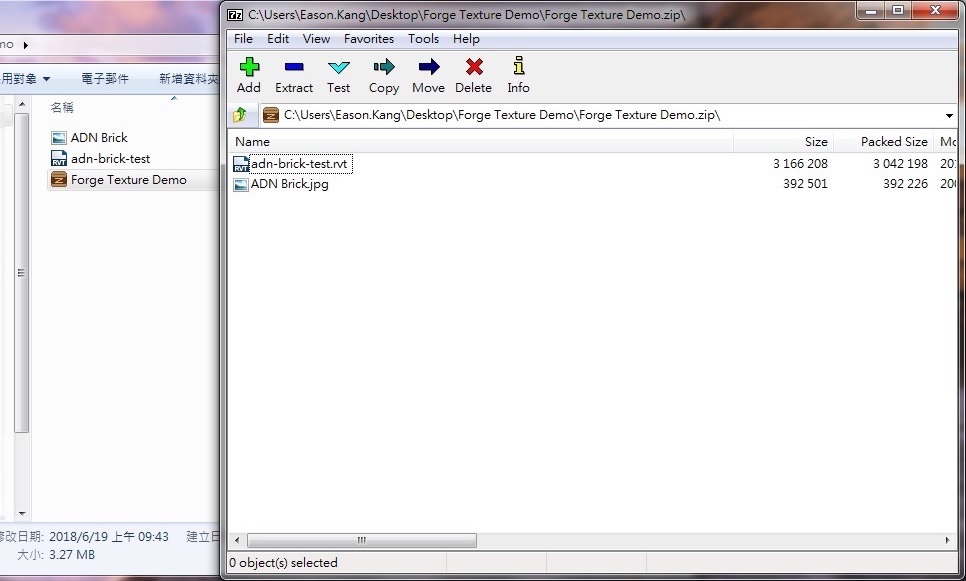
3. All used custom texture images should be put along with the RVT file, i.e. all files of JPG, PNG, and RVT should be in the same level of the directory.
4. All texture images and the RVT file should be compressed into a single ZIP package.
Let's start preparing our model files for translation now:
1. Change the visual style in 3D view into Realistic:

2. Make sure all filename and paths are ASCII characters:
3. Select and add 3D views into the view set in the Revit Publish Settings dialog:

4. Put all custom texture files along with the RVT file and in the same directory level:

5. Create a ZIP archive of the step4:
6. Upload the ZIP to your Forge OSS bucket and Trigger a translation job with this configuration:
{
"input": {
"urn": "{BASE64_URN_OF_THE_ZIP}", //!<<< e.g. dXJuOmFkc2sub2JqZWN0czpvcy5vYmplY3Q6bXlidWNrZXQvRm9yZ2UgVGV4dHVyZSBEZW1vLnppcA
"compressedUrn": true,
"rootFilename": "{THE_HOST_RVT_FILENAME}" //!<<< e.g. adn-brick-test.rvt
},
"output": {
"formats": [
{
"type": "svf",
"views": [
"2d",
"3d"
]
}
]
}
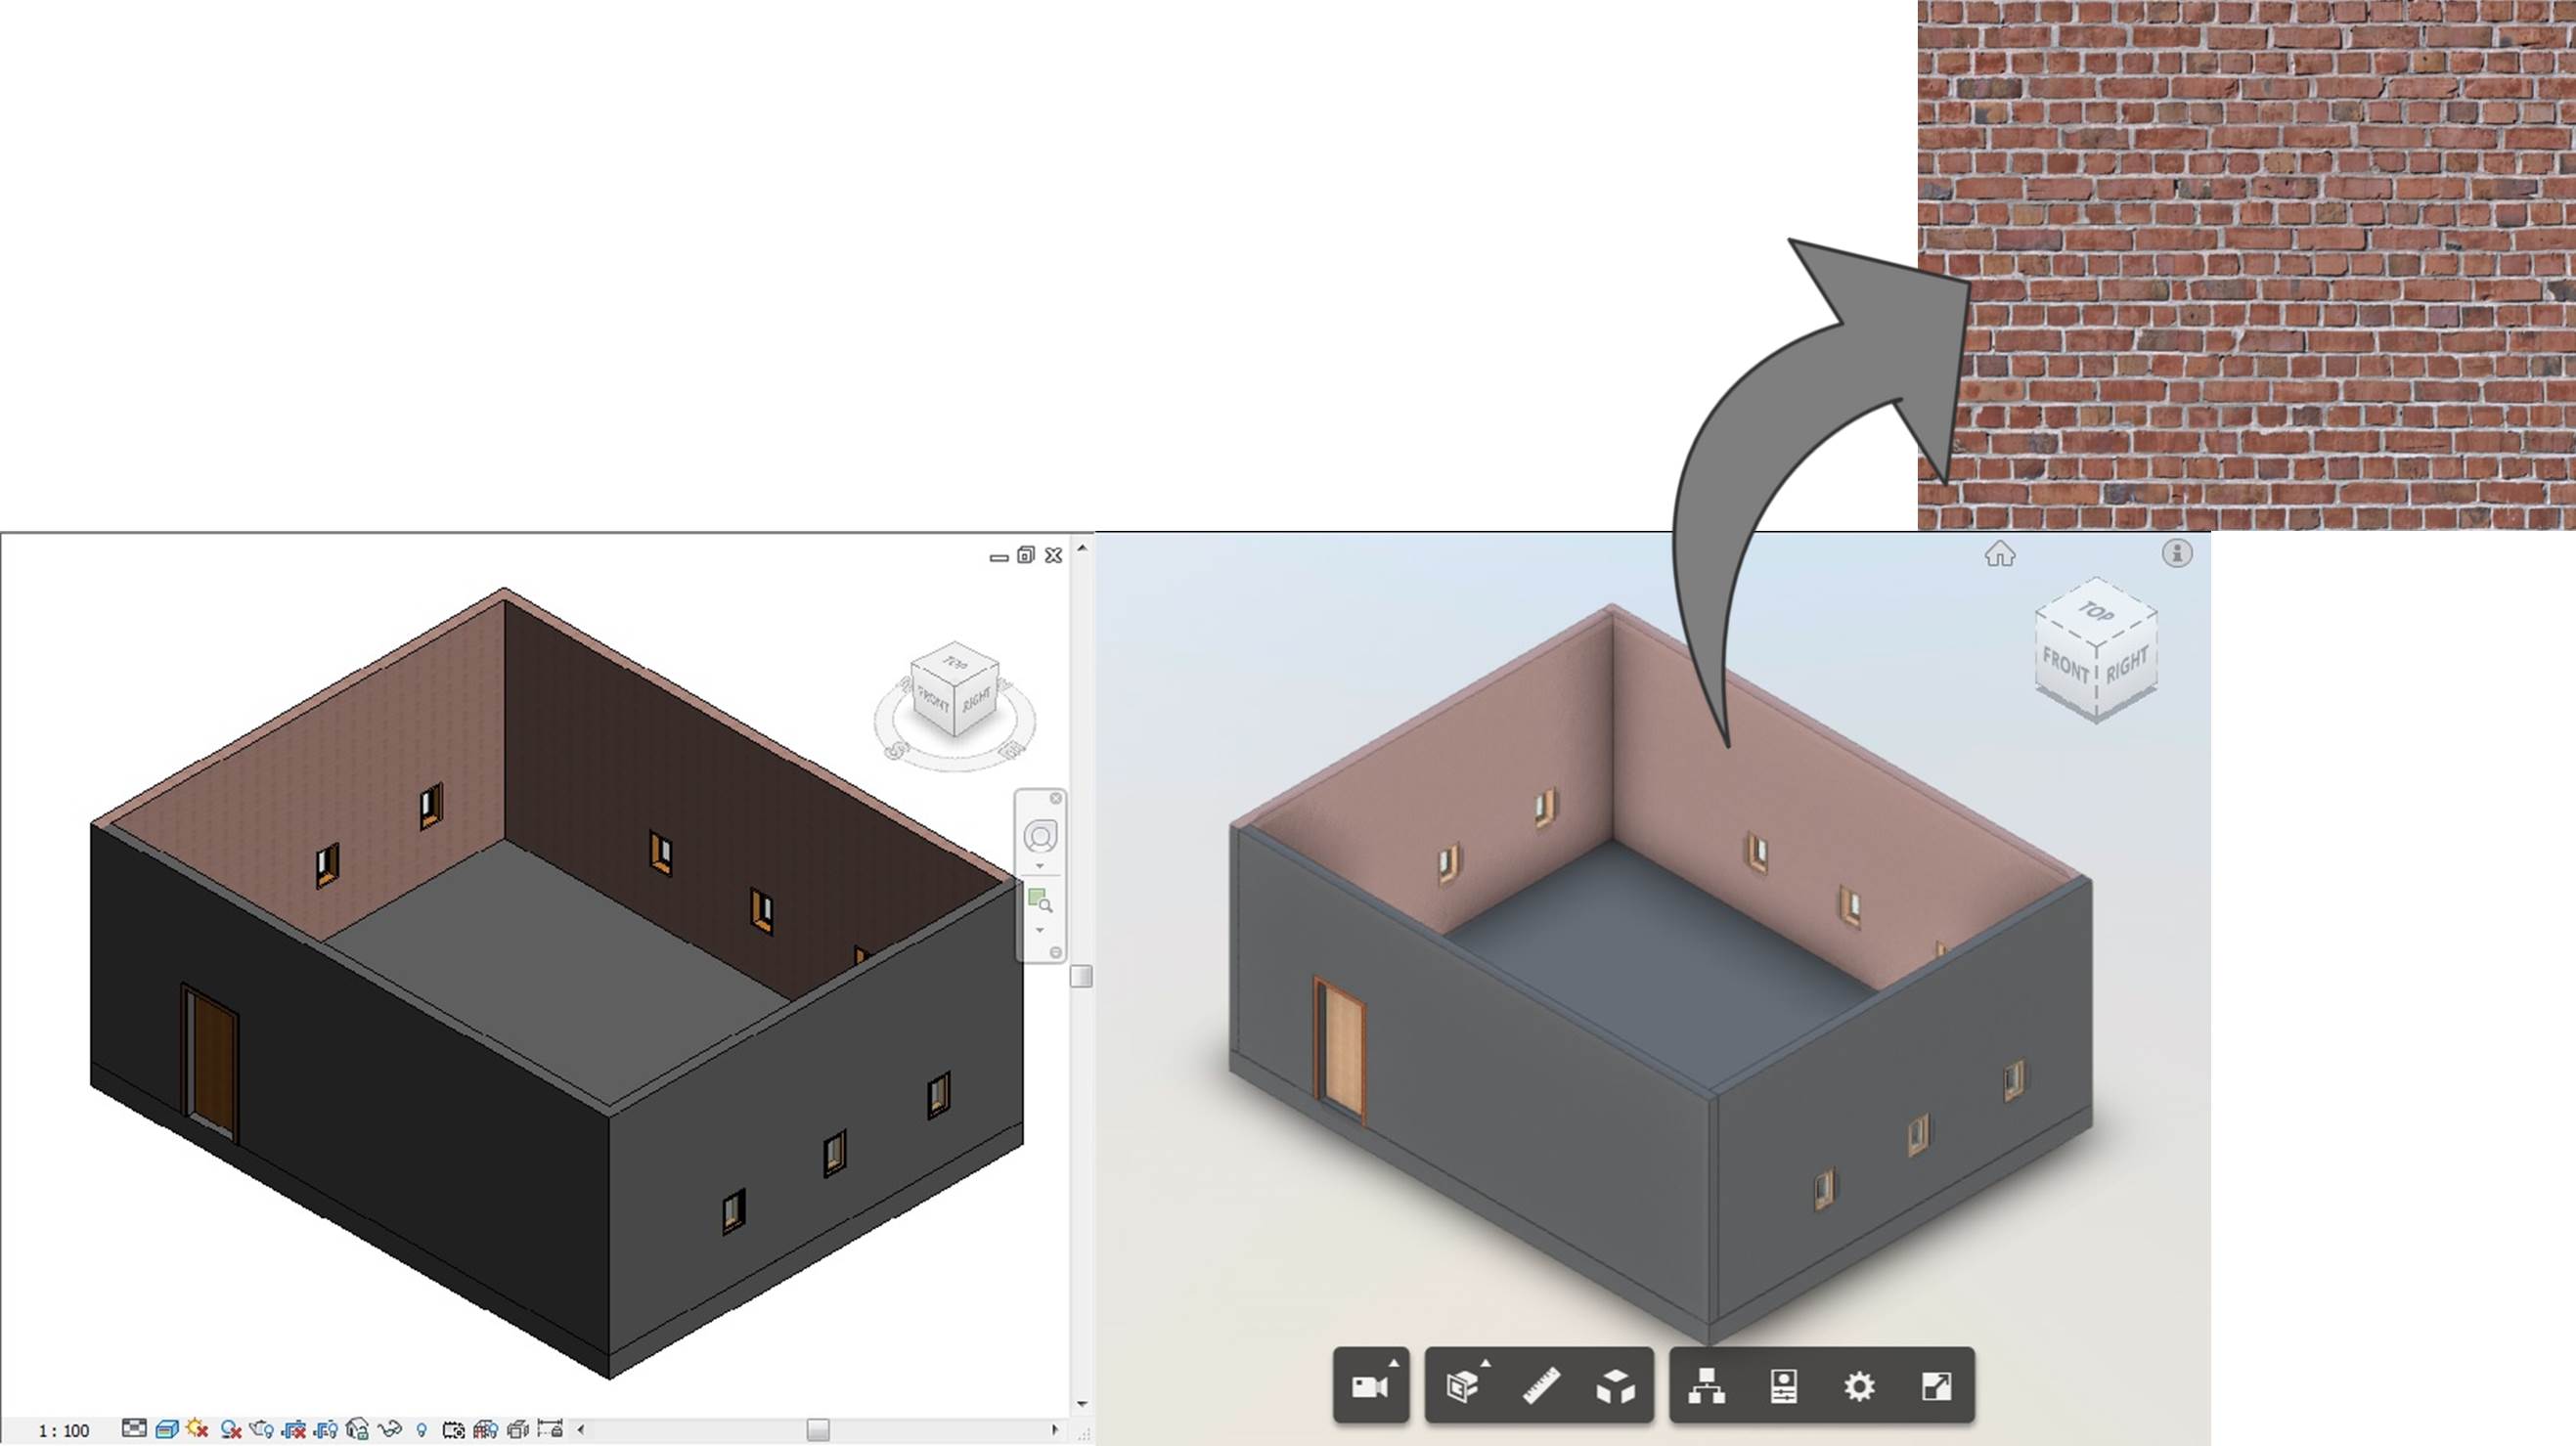
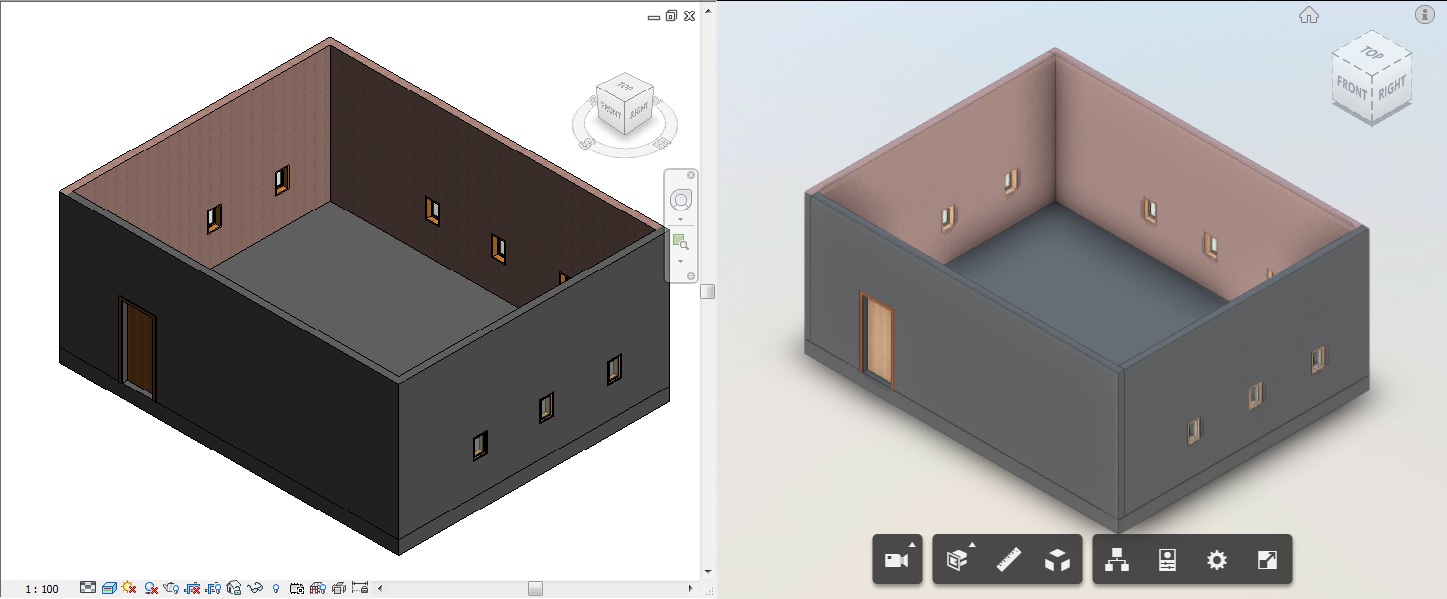
}7. Load translated model on Forge Viewer, and will see the custom texture shown on the screen: