
Recently we've been getting questions around the same topic:
"What would be the most cost-effective way to run my Forge application on Microsoft Azure?"
To address that question, let's take a look at how you can build a basic Forge application (allowing users to upload, translate, and preview their designs), and deploy it to Azure in a cost-effective, "serverless" way, using Azure Functions and an Azure Storage container acting as a static website.
We will be implementing the backend of our application using Node.js and TypeScript but you are free to choose any of the supported languages.
Prerequisites
Authentication
In order to authenticate yourself when talking to the various Forge services, you will need a Forge application with its credentials - client ID and client secret. If you'd like to create a new application, the official tutorial can help with that.
Tools
Azure resources and application deployments can be managed in various ways, for example, through https://portal.azure.com, or using the official command-line tools. In this blog post we will provision the Azure resources through the web portal, and then deploy our application from Visual Studio Code using the official Azure Extensions.
If you don't have Visual Studio Code yet, download and install the latest "stable" version from https://code.visualstudio.com/Download.
If you don't have the Azure extensions, you can install them from https://marketplace.visualstudio.com/items?itemName=ms-vscode.vscode-node-azure-pack.
Optionally you can also install Autodesk Forge Tools, an extension that allows you to manage your Forge services and data directly from Visual Studio Code as well.
Infrastructure
First of all, let's provision the Azure infrastructure for our application. We will need two resources, a Storage account (used as a static website serving our assets, and as a temporary local storage for our backend code), and a Function app (basically, a virtual machine and a specific language runtime used to execute our backend code).
Here's how the two Azure resources should be configured:
- Storage account
- Choose any Resource group, Storage account name, and Location you like
- Set Account kind to StorageV2 to enable the static website capability
- After the resource is created, enable the Static website capability, and set both the Index document name and the Error document path to index.html
- Make note of the Primary endpoint URL as we will need it later
- Function app
- Choose any Resource group, Function App name, and Region you like; we'd suggest using the same resource group and location as above
- In our case we will be deploying a Node.js/TypeScript code directly, so we will set the Publish option to Code, Runtime stack to Node.js, and Version to 12 LTS
- For Storage account, you can reuse the same storage we created earlier, or use a separate one
- Set Operating system to the system you want your application to run on; we will be using Linux
- Make sure to set Plan type to Consumption (Serverless); this way we will not be using an "always up" compute resource, and Azure will only charge for the time our Azure Functions are actually running
- After the resource is created, go to its CORS configuration and add the URL of our static website as another allowed origin
- Make note of the URL of the Azure Function app (it should look something like
https://<name of your function app>.azurewebsites.net); this is where our client side code will be making HTTP requests to
As we mentioned earlier, the Azure resources can be managed in many different ways. Here's a quick video tutorial on configuring our two resources via the web portal:
And with that, our Azure infrastructure is now ready, so let's build a Forge application we can deploy!
Application
Setup
Create an empty folder, and open it with Visual Studio Code. This will be our workspace.
In the editor, switch to the Azure sidebar. If you haven't logged into Azure from Visual Studio Code yet, you will likely see something like this:
You may see more or fewer collapsible sections in the sidebar, depending on how exactly you've installed the Azure extensions, but the only two sections we will need are FUNCTIONS and STORAGE.

In that case, click on one of the Sign in to Azure... prompts, log in via browser, and then come back to the editor.
Finally, you should see the Storage account resource you've created in the STORAGE section, and the Function app you've created in the FUNCTIONS section.

 Now it's time to start building our Forge application!
Backend implementation
With the Azure sidebar still open, go to the FUNCTIONS section, and hit the small folder icon to create a new Azure Functions project locally. Visual Studio Code will prompt you for a couple of things:
- Select the folder that will contain your function project
- Choose the empty folder you've created
- Select a language
- Choose a programming language for your Azure Functions; we will be using TypeScript
- Select a template for your project's first function
- Choose Skip for now, we will add a couple of functions momentarily

Next we will create three Azure Functions that will handle HTTP requests made from our client-side app: one for listing models that can be viewed in our application, one for uploading and translating a new model, and one for generating an access token for Forge Viewer hosted on our webpage.
While still in the Azure sidebar, go to the FUNCTIONS section, and use the small lightning icon to create three Azure Functions - ListModels, UploadModel, and GenerateToken - each one based on the HTTP Trigger template, and with Authorization level set to Anonymous.

Perfect! When you switch over to the Explorer sidebar in Visual Studio Code, your project's folder structure should look like this:

Open the integrated terminal in Visual Studio Code (for example, via the Terminal > New Terminal menu), make sure that it's a either cmd.exe or bash-based terminal (not PowerShell), and install the Node.js dependencies:
npm install
Since we will be working with Forge APIs and we will also need to upload files to one of our Azure Functions, let's install two additional npm modules that will help us with that: forge-server-utils and parse-multipart:
npm install --save forge-server-utils parse-multipart
GenerateToken
Alright, time to implement the backend logic. Let's start with the GenerateToken function. We will update the definition of this Azure Function to only support GET HTTP requests made to the /api/auth/token endpoint. Update the GenerateToken/function.json file with the following content:
{
  "bindings": [
    {
      "route": "auth/token",
      "authLevel": "anonymous",
      "type": "httpTrigger",
      "direction": "in",
      "name": "req",
      "methods": [
        "get"
      ]
    },
    {
      "type": "http",
      "direction": "out",
      "name": "res"
    }
  ],
  "scriptFile": "../dist/GenerateToken/index.js"
}
Notice that the "route" parameter is set to "auth/token" and not "/api/auth/token". By default, Azure Functions will automatically prefix the route with "/api/".
In the function code itself we will simply generate a two-legged access token with a single scope viewables:read. The Forge client ID and client secret will be retrieved from environment variables FORGE_CLIENT_ID and FORGE_CLIENT_SECRET (we will define those later). Replace the content of GenerateToken/index.ts with the following:
import { AzureFunction, Context, HttpRequest } from '@azure/functions';
import { AuthenticationClient } from 'forge-server-utils';

const { FORGE_CLIENT_ID, FORGE_CLIENT_SECRET } = process.env;
let authClient = new AuthenticationClient(FORGE_CLIENT_ID, FORGE_CLIENT_SECRET);

const GenerateToken: AzureFunction = async function (context: Context, req: HttpRequest): Promise<void> {
    try {
        const credentials = await authClient.authenticate(['viewables:read']);
        context.res = { body: credentials };
    } catch (err) {
        context.res = { status: 400, body: err.message || err };
    }
};

export default GenerateToken;
ListModels
Similarly, we will update the definition of the ListModels function so that it's executed everytime someone makes a GET request to the /api/models endpoint. Update the ListModels/function.json file with the following content:
{
    "bindings": [
        {
            "route": "models",
            "authLevel": "anonymous",
            "type": "httpTrigger",
            "direction": "in",
            "name": "req",
            "methods": [
                "get"
            ]
        },
        {
            "type": "http",
            "direction": "out",
            "name": "res"
        }
    ],
    "scriptFile": "../dist/ListModels/index.js"
}
The implementation of this Azure Function will make sure that a specific Forge bucket exists, and it will generate a JSON list with names and URNs of all models available in this bucket. The name of the bucket will be retrieved from an environment variable FORGE_BUCKET. Replace the content of ListModels/index.ts with the following:
import { AzureFunction, Context, HttpRequest } from '@azure/functions';
import { DataManagementClient, DataRetentionPolicy, urnify } from 'forge-server-utils';

const { FORGE_CLIENT_ID, FORGE_CLIENT_SECRET, FORGE_BUCKET } = process.env;
let dataManagementClient = new DataManagementClient({ client_id: FORGE_CLIENT_ID, client_secret: FORGE_CLIENT_SECRET });

const ListModels: AzureFunction = async function (context: Context, req: HttpRequest): Promise<void> {
    try {
        // Ensure the bucket exists
        try {
            await dataManagementClient.getBucketDetails(FORGE_BUCKET);
        } catch (err) {
            if (err.statusCode === 404) {
                await dataManagementClient.createBucket(FORGE_BUCKET, DataRetentionPolicy.Temporary);
            } else {
                throw err;
            }
        }

        // List objects
        let objects = await dataManagementClient.listObjects(FORGE_BUCKET);
        context.res = {
            body: objects.map(obj => ({
                name: obj.objectKey,
                urn: urnify(obj.objectId)
            }))
        };
    } catch (err) {
        context.res = { status: 400, body: err.message || err };
    }
};

export default ListModels;
UploadModel
Finally, let's update our UploadModel function so that we can upload a file to it via a POST request to the /api/models endpoint (with multipart/form-data content type), and have the model translated using the Forge Model Derivative service. Update the UploadModel/function.json file, adding "post" as the only allowed HTTP method, and setting the "route" property to "models". The final JSON should look like this:
{
    "bindings": [
        {
            "route": "models",
            "authLevel": "anonymous",
            "type": "httpTrigger",
            "direction": "in",
            "name": "req",
            "methods": [
                "post"
            ]
        },
        {
            "type": "http",
            "direction": "out",
            "name": "res"
        }
    ],
    "scriptFile": "../dist/UploadModel/index.js"
}
The implementation of this function will read the contents of the received file, upload it to the pre-configured bucket in the Forge Data Management service, and start an asynchronous translation job in the Forge Model Derivative service. Replace the content of UploadModel/index.ts with the following:
import { AzureFunction, Context, HttpRequest } from '@azure/functions';
import * as multipart from 'parse-multipart';
import { DataManagementClient, DataRetentionPolicy, ModelDerivativeClient, urnify } from 'forge-server-utils';

const { FORGE_CLIENT_ID, FORGE_CLIENT_SECRET, FORGE_BUCKET } = process.env;
let dataManagementClient = new DataManagementClient({ client_id: FORGE_CLIENT_ID, client_secret: FORGE_CLIENT_SECRET });
let modelDerivativeClient = new ModelDerivativeClient({ client_id: FORGE_CLIENT_ID, client_secret: FORGE_CLIENT_SECRET });

interface IMultipartFile {
    filename: string;
    type: string;
    data: Buffer;
}

function parse(req: HttpRequest): IMultipartFile[] {
    const boundary = multipart.getBoundary(req.headers['content-type']);
    // Be careful, the `multipart` module can only parse bodies with files, not with text fields
    const parts = multipart.Parse(Buffer.from(req.body), boundary);
    return parts;
}

const UploadModel: AzureFunction = async function (context: Context, req: HttpRequest): Promise<void> {
    try {
        // Ensure the bucket exists
        try {
            await dataManagementClient.getBucketDetails(FORGE_BUCKET);
        } catch (err) {
            if (err.statusCode === 404) {
                await dataManagementClient.createBucket(FORGE_BUCKET, DataRetentionPolicy.Temporary);
            } else {
                throw err;
            }
        }

        // Upload the model
        const files = parse(req);
        if (!files || files.length === 0) {
            throw new Error('No file found.');
        }
        const obj = await dataManagementClient.uploadObject(FORGE_BUCKET, files[0].filename, 'application/octet-stream', files[0].data);
        await modelDerivativeClient.submitJob(urnify(obj.objectId), [{ type: 'svf', views: ['2d', '3d'] }]);
        context.res = { status: 200 };
    } catch (err) {
        context.res = { status: 400, body: err.message || err };
    }
};

export default UploadModel;
And with that, our Azure Function app is now complete. To test it out locally, add the three environment variables we discussed earlier (FORGE_CLIENT_ID, FORGE_CLIENT_SECRET, and FORGE_BUCKET) to the local.settings.json file in your project folder:
{
    "IsEncrypted": false,
    "Values": {
        "AzureWebJobsStorage": "",
        "FUNCTIONS_WORKER_RUNTIME": "node",
        "FORGE_CLIENT_ID": "<enter your client ID>",
        "FORGE_CLIENT_SECRET": "<enter your client secret>",
        "FORGE_BUCKET": "<enter your bucket name>"
    }
}
Now, run the application in Visual Studio Code - either with the F5 key or via the Run > Start Debugging menu - and try visiting http://localhost:7071/api/auth/token or http://localhost:7071/api/models in your browser. You should see valid JSON responses containing an access token, and a list of models, respectively.
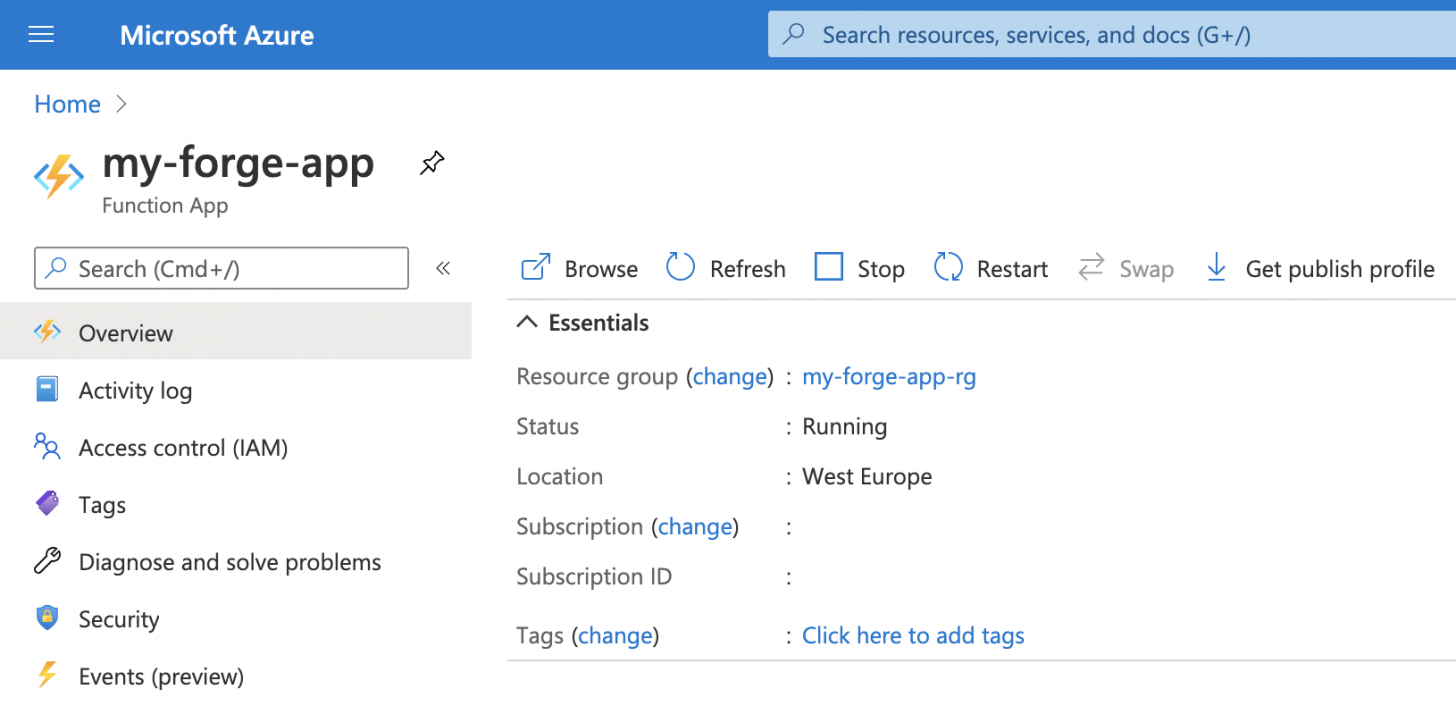
You can also try and deploy your new Azure Functions to Azure. In Visual Studio Code, switch to the Azure sidebar, and in the FUNCTIONS section, hit the up arrow button to deploy your local project to the Function app you provisioned earlier.

Of course, when our code runs in Azure, it will need the same three environment variables we setup for our local project (in the local.settings.json file). You could configure the env. variables through the Azure web portal as well but in Visual Studio Code there's an easier way: in the Azure sidebar, expand your Function app, right-click on the Application Settings, and choose Upload Local Settings. This will take all the env. variables from local.settings.json and add them to your Function app in Azure.

When the deployment is finished, you can test your application in Azure using the Function app URL we stored earlier. Again, the URL should have a form of https://<name of your function app>.azurewebsites.net, so try opening https://<name of your function app>.azurewebsites.net/api/auth/token or https://<name of your function app>.azurewebsites.net/api/models in your browser.
Frontend implementation
To wrap things up, let's build a simple client using just HTML, CSS, and vanilla JavaScript. Create a new folder called www in the root of your project - everything in this folder will be deployed to the Azure storage account that was configured as a static website.
Let's start with the HTML. Create a new file - www/index.html - and add the following markup to it:
<!DOCTYPE html>
<html lang="en">

<head>
    <meta charset="UTF-8">
    <meta name="viewport" content="width=device-width, initial-scale=1.0">
    <meta http-equiv="X-UA-Compatible" content="ie=edge">
    <link rel="stylesheet" href="https://developer.api.autodesk.com/modelderivative/v2/viewers/7.*/style.css" type="text/css">
    <script src="https://developer.api.autodesk.com/modelderivative/v2/viewers/7.*/viewer3D.js"></script>
    <link rel="stylesheet" href="/main.css">
    <title>Autodesk Forge: My First App</title>
</head>

<body>
    <div id="header">
        <span class="title">My First App</span>
        <select name="models" id="models"></select>
        <button id="upload" title="Upload New Model">+</button>
        <input style="display: none" type="file" id="input">
    </div>
    <div id="preview"></div>
    <script src="/main.js"></script>
</body>

</html>
We just include the Forge Viewer JavaScript/CSS, reference our own JavaScript/CSS, and we add a minimalistic UI for listing and uploading designs.
Next, add a www/main.css file, and fill it with the following code:
@font-face {
    font-family: 'ArtifaktElement';
    src: url('https://fonts.autodesk.com/ArtifaktElement/EOT/Artifakt%20Element%20Hair.eot');
}

body, html {
    margin: 0;
    padding: 0;
    height: 100vh;
    font-family: ArtifaktElement;
}

#header {
    position: absolute;
    width: 100%;
    height: 3em;
    display: flex;
    flex-flow: row nowrap;
    justify-content: space-between;
    align-items: center;
}

#header > * {
    margin-left: 0.5em;
    margin-right: 0.5em;
    font-family: ArtifaktElement;
    font-size: 1em;
}

#header .logo, #models, #upload {
    height: 2em;
}

#header .title {
    flex: 1 0 auto;
}

#models {
    min-width: 0; /* Reset the input's "intrinsic" width */
    flex: 0 1 auto;
}

#upload {
    margin-left: 0;
    font-weight: bold;
    width: 2em;
}

#preview {
    position: absolute;
    width: 100%;
    height: calc(100% - 3em);
    top: 3em;
}
Nothing magical here. We just bring in the "Artifakt" font from the Autodesk website, make a fixed-height header at the top for the UI, and leave the rest of the real estate to Forge Viewer.
Finally, create a www/main.js file, and add the following code to it:
const AZURE_FUNC_APP_URL = '<add your Azure Function app URL here>';

Autodesk.Viewing.Initializer({ getAccessToken }, async function () {
    const viewer = new Autodesk.Viewing.GuiViewer3D(document.getElementById('preview'));
    viewer.start();
    viewer.setTheme('light-theme');
    const urn = window.location.hash ? window.location.hash.substr(1) : null;
    setupModelSelection(viewer, urn);
    setupModelUpload(viewer);
});

async function getAccessToken(callback) {
    const resp = await fetch(AZURE_FUNC_APP_URL + '/api/auth/token');
    if (resp.ok) {
        const { access_token, expires_in } = await resp.json();
        callback(access_token, expires_in);
    } else {
        alert('Could not obtain access token. See the console for more details.');
        console.error(await resp.text());
    }
}

async function setupModelSelection(viewer, selectedUrn) {
    const models = document.getElementById('models');
    models.setAttribute('disabled', 'true');
    models.innerHTML = '';
    const resp = await fetch(AZURE_FUNC_APP_URL + '/api/models');
    if (resp.ok) {
        for (const model of await resp.json()) {
            const option = document.createElement('option');
            option.innerText = model.name;
            option.setAttribute('value', model.urn);
            if (model.urn === selectedUrn) {
                option.setAttribute('selected', 'true');
            }
            models.appendChild(option);
        }
    } else {
        alert('Could not list models. See the console for more details.');
        console.error(await resp.text());
    }
    models.removeAttribute('disabled');
    models.onchange = () => loadModel(viewer, models.value);
    if (!viewer.model && models.value) {
        loadModel(viewer, models.value);
    }
}

async function setupModelUpload(viewer) {
    const button = document.getElementById('upload');
    const input = document.getElementById('input');
    button.addEventListener('click', async function () {
        input.click();
    });
    input.addEventListener('change', async function () {
        if (input.files.length !== 1) {
            return;
        }
        const file = input.files[0];
        let data = new FormData();
        data.append('model-file', file);
        button.setAttribute('disabled', 'true');
        button.innerText = 'Uploading ...';
        const resp = await fetch(AZURE_FUNC_APP_URL + '/api/models', { method: 'POST', body: data });
        if (resp.ok) {
            input.value = '';
            setupModelSelection(viewer);
        } else {
            alert('Could not upload model. See the console for more details.');
            console.error(await resp.text());
        }
        button.innerText = 'Upload';
        button.removeAttribute('disabled');
    });
}

function loadModel(viewer, urn) {
    function onDocumentLoadSuccess(doc) {
        viewer.loadDocumentNode(doc, doc.getRoot().getDefaultGeometry());
    }
    function onDocumentLoadFailure(code, message) {
        alert('Could not load model. See the console for more details.');
        console.error(message);
    }
    window.location.hash = urn;
    Autodesk.Viewing.Document.load('urn:' + urn, onDocumentLoadSuccess, onDocumentLoadFailure);
}
At the beginning of the script we initialize Forge Viewer as usual, and when done, we initialize the "model selection UI" (fancy name for a <select> element) and the "model upload UI" (fancy name for a <button> and an <input type="file"> element).
Now the tricky part: since our client-side code runs on a different URL (one created for us by the Azure storage account), it will need to know the URL of our Azure Function app. For now, we just hard-code the URL into a global constant called AZURE_FUNC_APP_URL. Again, the Function app URL should look something like this: https://<name of your function app>.azurewebsites.net.
And that's all for our client-side code. To deploy it to our static website in Azure, right-click on the www folder in Visual Studio Code, hit Deploy to Static Website via Azure Storage..., and when prompted, choose the Azure storage we created earlier.

Wrap up
You did it! You now have a simple, cost-effecive, serverless architecture in Azure, with static assets deployed to and served from an Azure storage container configured as a static website, and with three RESTful endpoints handled by Azure Functions. Remember the "primary endpoint" URL that was generated for us after we enabled the static website capability of our Azure storage account? It should look like this: https://<name of your storage account>.<code of your region>.web.core.windows.net. Visit the address in your browser, and you should see your complete Forge application.
If you're having any issues with the code, or if you'd prefer to just clone and test an existing project, take a look at the experiment/azure-funcs branch of the https://github.com/petrbroz/forge-basic-app repository.
Other considerations
Here's some more ideas to consider when building your serverless application in Azure:
Consumption, Premium, or Dedicated plan
When we provisioned our Function app in Azure, we chose the Consumption (Serverless) plan, meaning that there is no dedicated, "always online" compute resource to execute our Azure Functions. Instead, whenever one of our Azure Functions is triggered (in our case by an HTTP request), Azure will find an available compute resource, execute the function there, and will only charge us for the execution time of the function. While this plan is the most effective one in terms of cost, you have other options to choose from as well:
- Premium plan is another auto-scaled solution where your Azure Functions are executed on pre-warmed (and more powerful) compute resources
- Billing for the Premium plan is based on the number of core seconds and memory allocated across instances
- With Dedicated plan, your Azure Functions are executed on a standard App Service compute resource with the usual pricing, for example:
- The "Basic B1" plan includes 10GB of disk space, 1 CPU core, 1.75GB of RAM, allows up to 3 instances, and costs approx. $0.075/hour
- The "Standard S1" plan includes 50GB of disk space, 1 CPU core, 1.75GB of RAM, allows up to 10 instances, and costs approx. $0.10/hour
To learn more about the different plans for Function apps, see the Azure Functions hosting options. And if you'd like to learn more about the App Service pricing, head over to https://azure.microsoft.com/en-us/pricing/details/app-service.