21 Aug 2018
Compare two 2D documents using APS Viewer

Want to compare two documents? .... Well, now you can !
In my last blog post, I covered viewing large 2D bitmaps inside the Forge Viewer (ie. OCR, PDFs, terrain maps).
In this blog post, I’ll continue using bitmaps and show you how to compare two versions.
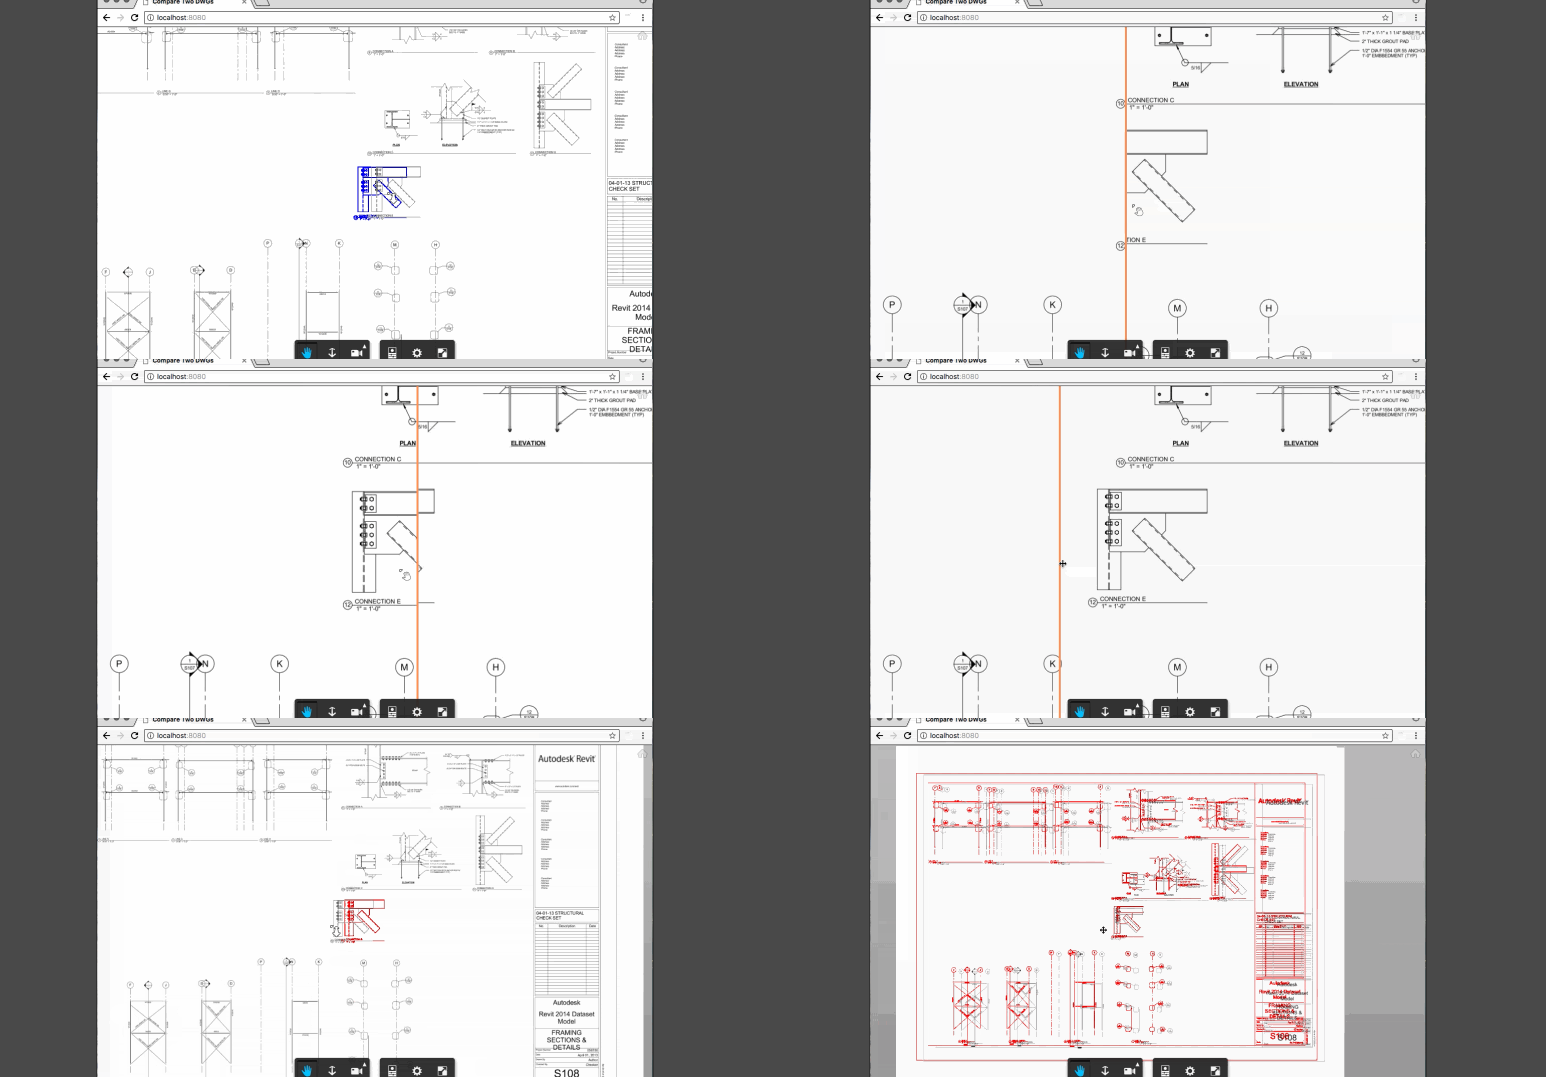
I’ll do this using a new ‘PixelComparison’ extension for the Forge viewer. It let’s you compare the difference between two designs, such as comparing different versions of a DWG file, either doing a ‘split screen’ or highlighting the differences in blue and red.

You’ll notice that this is the same extension used in BIM360. Let me show you how you can use it in your own Forge Viewer.
To get started, you’ll need two 2D drawings to compare. Let’s compare two different versions of a DWG design that have some small changes. We will load in URN1 and then let the extension load URN2 and then kick off the visual comparison.
Getting started
Steps:
1. Load URN1 the normal way - viewer.load(URN1)
2. Load the ‘Pixel Compare’ extension
3. Load URN2 - pixelCompareExt.compareModelWithCurrent(URN2)

4. Switch ‘modes’ using the keyboard - pixelCompareExt.setDiffMode( n );
and here's the main source code...
var viewer;
var avp = Autodesk.Viewing.Private;

function initializeViewer() {
    var options = {
        env: "Local",
        useADP: false,
        config3d: {
            extensions: ['Autodesk.Viewing.PixelCompare']
        },
        urn1: "2DCompare/sheet1/bubble.json",
        urn2: "2DCompare/sheet2/bubble.json",
    }

    options.config3d.compareSplitLineStyle = {
        width: 4,
        color: '#FF9054'
    };

    viewer = new avp.GuiViewer3D(document.getElementById('forgeViewer'), options.config3d);

    Autodesk.Viewing.Initializer(options, function() {
        viewer.start();
        Autodesk.Viewing.Document.load(options.urn1,
            function(document, errorsandwarnings) {
                var geometryItems = Autodesk.Viewing.Document.getSubItemsWithProperties(document.getRootItem(), {
                    'type': 'geometry',
                    'role': '2d'
                }, true);

                if (geometryItems.length > 0) {
                    var loadOptions = {};
                    var path = document.getViewablePath(geometryItems[0], loadOptions);
                    viewer.load(path, null, onLoadSuccess, null, document.acmSessionId, loadOptions);
                }

            }
        )
    });

    function onPixelCompareExtensionLoaded(pixelCompareExt) {
		var offsetMode = false;

        function onKeyDown(event) {
        	if (!event.keyCode) return;
        	if ((event.keyCode < 49) || (event.keyCode > 54)) return;

            if (event.keyCode == 49) {
                offsetMode = !offsetMode;
                pixelCompareExt.setChangeOffsetMode( offsetMode );
            } else
	            pixelCompareExt.setDiffMode(event.keyCode - 49);
        };
        window.addEventListener('keydown', onKeyDown);

        pixelCompareExt.compareModelWithCurrent(options.urn2).then(function(result) {
            console.log(`compare models ${result?"successful, yeah":"failed, boo"}`);
        });
    }

    function onLoadSuccess() {
        viewer.loadExtension('Autodesk.Viewing.PixelCompare').then(onPixelCompareExtensionLoaded);
    }
}
How to Use
In the animation below, you can see the comparison in action...

- press the key 1, which toggles the offset mode.
- Then press 2 and 3, which toggles between URN1 and URN2…
- Pressing 4 switches on ‘split screen’ mode.
- Pressing 5 and 6, toggles on the blue/red difference highlighting.
And that’s it.
Here's a LIVE DEMO
The source code on GitHub here.
For any issues you find, please add them to Github-Issues.
Follow me on twitter here @micbeale


