
This is a multi-API and multi-Engine sample, demonstrating a super interesting workflow. This sample uses the same foundation and basics as this other sample, Design Check for Revit, so worth checking it too.
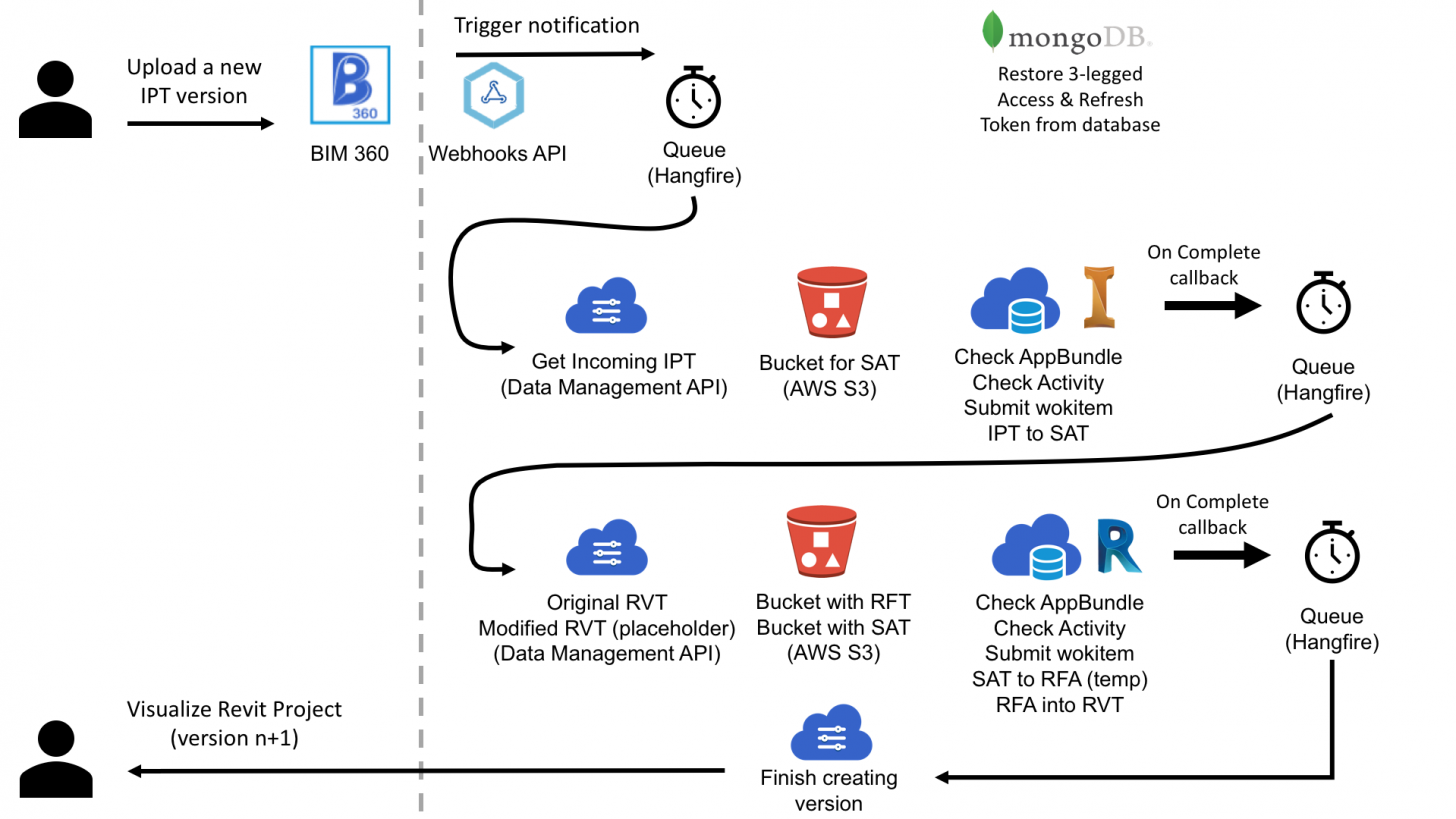
Here we want to listen for new IPT versions of files a specific folder, which triggers the entire process: export from IPT to SAT using Inventor, then from SAT to RFA using Revit, which also updates the Family inside the RVTs on the same folder. The video shows it running, when a user uploads a new IPT of a chair, the process will update the RVT project with the new geometry.
And the steps are:
- Check if AppBundle is defined
- Check if Activity is defined
- Check if Family Template (RFA) is available
- Prepare a link to access the IPT (from BIM 360)
- Submit workitem: convert IPT to SAT, save back to S3
- Prepare a link to access the RVT(from BIM 360)
- Submit workitem: import SAT into the RFA, load into project and save back to BIM 360
You can access the source code here.
Note the plugins under \inventor and \revit folders, it should create the .bundle ZIP at the \web\wwwroot\bundles folder, which is then used to setup Design Automation. Also under \web\Controllers you'll see the DesignAutomation4Inventor and DesignAutomation4Inventor classes, which defines the respective AppBundles, Activities and Workitems. The DesignAutomationController handles the callbacks, which WebHookController is the place where it all starts. The OAuth classes are there to handle permissions and tokens (from Database). AWS S3 is used to store files used during the process.